
WINE CHARMS

I admit I have a minor *cough* addiction to Pinterest. Since becoming a SAHM 3 years ago I am slowly getting into crafts. Some days I wonder when did Martha S drop by. I never thought I would be that Mom making animal shaped cookies and cardboard houses. Yep it happened but not over night.
Last year I became interested in Aromatherapy after learning it's affects on Cancer patients. Someone close was diagnosed. I used my knowledge to create a Spa gift basket for Christmas Gifts.
This year Wine somehow became the theme. Possibly from a night of having too many after watching 3 young toddlers tear up the house. Who knows.
I go through cycles of researching and researching for a week or two. Then the fun begins. Searching for supplies, ordering, hiding boxes from the husband who thinks I lost it. The next phase is crafting and creating.
Cute little Pinterest came up with this option of secret boards. WOOHOO! No more hiding my inspirations in random food boards.
The Charm above was then created from my research. Here are some inspirational pins.
I misplaced the first video but it's simple. You have to remove the wax coating inside the bottle caps. It's very important you purchase unused caps for bottling. The used ones will not flatten properly. You need a mug warmer or candle warmer. You will also need something to protect your hands like a pot holder or glove. You want to heat the cap on the plate. The first will take longer than the others since you just turned the heat on. Watch the wax change translucent. That is when you want to quickly pick up the cap with protection and use something like tweezers to peel the wax off. If it's completely heated it should come off in one piece. It took several caps to practice the technique.
Youtube video on how to flatten bottle caps with the cuttlebug. Now I didn't have a metal diecut like shown in the video so I used a cat food can lid. Properly clearned first of course.
Youtube video mainly to see how to manipulate the wire. Since I went with a coated wire I had to cut and form them myself. I did find silver rings I purchased for future projects.
I used a Krylon short cuts paint pen to color the bottlecap in bronze. Let dry overnight.
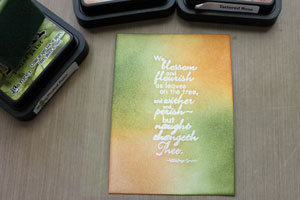
The above photo belongs to Splitcoaststampers. This photo was the inspiration for the images in my caps. I followed her technique shown here with distress inks, white embossing powder and floral stamps. I used a 1 inch circle hole punch to cut out the circles.
Glue the image to the bottle cap & then apply the Epoxy stickers over top the image. Let that dry over night before assembling the jumper ring. You will need a hole puncher for metal. I found mine in the jewelry making isle of Michaels, not the kids section. I purchased my beads at amazon, Michaels, and Walmart. I highly recommend Walmart. The prices are so much cheaper.

I hope I inspired some of you. Oh and you can use these as napkin ring holders too. ;-)
No comments:
Post a Comment